A very confused beginner

Hey all,

Sorry as this is probably very straight forward to people that actually know what they’re doing, I bought a CW Husky kit with all the targets etc. as I would love to dive in and learn all about this stuff, but to be honest it’s as clear as mud in how to get started, or seems to be contradicting?

In the physical little booklet that came in the box, page 18 mentions that for each lab, set the target PLATFORM=‘CW308_SAM4S’, ok no problem.

Get ChipWhisperer installed on Windows, no issues, load up jupyter/1-Connecting to Hardware, first thing it says relating to CW Husky is to set PLATFORM=‘CWHUSKY’…okay, starting to get confused.

Scroll down to the “Building and Uploading Firmware” section in that notebook, asking for a platform, so try what the top of the notebook says, set it to CWHUSKY, read the notebook, says about leaving PLATFORM blank and it will list them all, ok cool…no CWHUSKY is listed…okay…must be the CW308_SAM4S then, like the physical booklet specifies.

That runs fine, next block you need to pick between three cw.program_target() lines, one for XMEGA, one for STM32F, one for AVR. No idea what any of this is, Nothing is said in any tutorials thus far about what this should be, for a CW Husky, connected to the CW313, with a CW312 SAM4S target inserted.

So, question 1. Which one am I meant to pick here and why?

#cw.program_target(scope, cw.programmers.XMEGAProgrammer, "path/to/firmware.hex")
cw.program_target(scope, cw.programmers.STM32FProgrammer, "../hardware/victims/firmware/simpleserial-base/simpleserial-base-CW308_SAM4S.hex")
#cw.program_target(scope, cw.programmers.AVRProgrammer, "path/to/firmware.hex")

The current one uncommented is not working. It’s returning this:

Failed to detect chip. Check following: 
   1. Connections and device power. 
   2. Device has valid clock (or remove clock entirely for internal osc).
   3. On Rev -02 CW308T-STM32Fx boards, BOOT0 is routed to PDIC.

Any tips? CW Husky is plugged in, green Status LED is flashing, CW313 red board also has a green LED constantly on. Windows made all right noises when plugging in the CW Husky, the previous notebook also said “Found ChipWhisperer :heart_eyes:”.

So again, forgive me if I’m missing something here, but on notebook 1 I’m already immensely confused. Not off to the best start!

Has it occurred to anyone that having one source of information that is up to date might be the best option moving forward? Ideally with a Where to Start section on how to get going as a beginner with what’s in the kit plus the various targets and what needs to happen in the notebooks based on what device and target you’re using. Rather than a physical notebook, jupyter notebooks, a readthedocs.io page, a github repo, and an rtfm.newae site for each device. :flushed:

Thanks in advance! :pray:

2 Likes

I’m sorry for the frustration you’ve experienced. We’re a very small team and we do our best; in this case, the issue has already been addressed on the develop branch. I’m guessing you’ve installed the 5.7.0 release. We are overdue for a release; I would recommend that you switch to the develop branch since it has lots of fixes and improvements that haven’t made their way to a release yet, especially on the Husky side of things.

@smc I share completely your frustration and confusion.

With total absence of prior knowledge of any of the NewAE products or procedures following the notebooks is very hard at first, as you mention there is some parts where the instructions looks contradictory and/or there are concepts or terms never explained nor documented yet

Don’t get me wrong I’m very gratefull about the documentation and all the help received from the forum and discord but being a person who doesn’t like to bother other people with his own problems and who likes to solve things by himself is a little embarrasing asking something like “how can I change or select the target on the husky” because I wasn’t unable to find it nor even on the husky specific notebooks under demos folder

@smc in the SCA101’s notebook “Part 4, Topic 1: Power and Hamming Weight Relationship (HARDWARE)” says:

First you’ll need to select which hardware setup you have. You’ll need to select a SCOPETYPE, a PLATFORM, and a CRYPTO_TARGET. SCOPETYPE can either be 'OPENADC' for the CWLite/CW1200 or 'CWNANO' for the CWNano. PLATFORM is the target device, with 'CWLITEARM'/'CW308_STM32F3' being the best supported option, followed by 'CWLITEXMEGA'/'CW308_XMEGA', then by 'CWNANO'. CRYPTO_TARGET selects the crypto implementation, with 'TINYAES128C' working on all platforms. An alternative for 'CWLITEXMEGA' targets is 'AVRCRYPTOLIB'. For example:

So platform is not the hardware we use in fact is the target we’re attacking

1 Like

That’s fine and ChipWhisperer and the Jupyter notebooks etc. are an amazing resource, just as a beginner I think it needs a little clearing up, especially if you’re a small team (surely it makes even more sense to just have one main source of truth for help/documentation/getting started, rather than what feels like 3 or 4 all with different answers).

Let’s face it, this stuff isn’t exactly cheap, so having clear beginner-friendly instructions is fairly important for both parties.

I’ll give the development branch a go then, do I need to uninstall the current ChipWhisperer platform I’ve already got installed on Windows? Or just install the development branch version over the top and it’ll overwrite it?

Thanks

Following the manual installation instructions should suffice.
If your existing install is from git, then git checkout develop is all you need to do.

1 Like

The last line of the manual install instructions failed.

python -m pip install -r jupyter/requirements.txt

Just cloned the development repo, followed the Windows manual install steps you linked but building the wheel for pyzmq fails.

Generating code
  Finished generating code
  building 'zmq.backend.cython._device' extension
  creating build\temp.win-amd64-cpython-312\Release\zmq
  creating build\temp.win-amd64-cpython-312\Release\zmq\backend
  creating build\temp.win-amd64-cpython-312\Release\zmq\backend\cython
  "C:\Program Files\Microsoft Visual Studio\2022\Community\VC\Tools\MSVC\14.39.33519\bin\HostX86\x64\cl.exe" /c /nologo /O2 /W3 /GL /DNDEBUG /MD -DWINVER=0x0602 -D_WIN32_WINNT=0x0602 -Ibundled\zeromq\include -Izmq\utils -IC:\Users\user\AppData\Local\Programs\Python\Python312\include -IC:\Users\user\AppData\Local\Programs\Python\Python312\Include "-IC:\Program Files\Microsoft Visual Studio\2022\Community\VC\Tools\MSVC\14.39.33519\include" "-IC:\Program Files\Microsoft Visual Studio\2022\Community\VC\Tools\MSVC\14.39.33519\ATLMFC\include" "-IC:\Program Files\Microsoft Visual Studio\2022\Community\VC\Auxiliary\VS\include" "-IC:\Program Files (x86)\Windows Kits\10\include\10.0.22621.0\ucrt" "-IC:\Program Files (x86)\Windows Kits\10\\include\10.0.22621.0\\um" "-IC:\Program Files (x86)\Windows Kits\10\\include\10.0.22621.0\\shared" "-IC:\Program Files (x86)\Windows Kits\10\\include\10.0.22621.0\\winrt" "-IC:\Program Files (x86)\Windows Kits\10\\include\10.0.22621.0\\cppwinrt" "-IC:\Program Files (x86)\Windows Kits\NETFXSDK\4.8\include\um" /Tczmq\backend\cython\_device.c /Fobuild\temp.win-amd64-cpython-312\Release\zmq\backend\cython\_device.obj
  _device.c
  zmq\backend\cython\_device.c(4372): error C2039: 'curexc_traceback': is not a member of '_ts'
  C:\Users\user\AppData\Local\Programs\Python\Python312\include\cpython/pystate.h(115): note: see declaration of '_ts'
  zmq\backend\cython\_device.c(4375): error C2039: 'curexc_traceback': is not a member of '_ts'
  C:\Users\user\AppData\Local\Programs\Python\Python312\include\cpython/pystate.h(115): note: see declaration of '_ts'
  zmq\backend\cython\_device.c(5408): error C2039: 'ob_digit': is not a member of '_longobject'
  C:\Users\user\AppData\Local\Programs\Python\Python312\include\cpython/longintrepr.h(87): note: see declaration of '_longobject'
  zmq\backend\cython\_device.c(5463): error C2039: 'ob_digit': is not a member of '_longobject'
  C:\Users\user\AppData\Local\Programs\Python\Python312\include\cpython/longintrepr.h(87): note: see declaration of '_longobject'
  zmq\backend\cython\_device.c(5680): error C2039: 'ob_digit': is not a member of '_longobject'
  C:\Users\user\AppData\Local\Programs\Python\Python312\include\cpython/longintrepr.h(87): note: see declaration of '_longobject'
  zmq\backend\cython\_device.c(5735): error C2039: 'ob_digit': is not a member of '_longobject'
  C:\Users\user\AppData\Local\Programs\Python\Python312\include\cpython/longintrepr.h(87): note: see declaration of '_longobject'
  zmq\backend\cython\_device.c(6086): error C2039: 'ob_digit': is not a member of '_longobject'
  C:\Users\user\AppData\Local\Programs\Python\Python312\include\cpython/longintrepr.h(87): note: see declaration of '_longobject'
  DEBUG EXT_SUFFIX '.cp312-win_amd64' '.cp312-win_amd64.pyd'
  ************************************************
  DEBUG EXT_SUFFIX '.cp312-win_amd64' '.cp312-win_amd64.pyd'
  ************************************************
  error: command 'C:\\Program Files\\Microsoft Visual Studio\\2022\\Community\\VC\\Tools\\MSVC\\14.39.33519\\bin\\HostX86\\x64\\cl.exe' failed with exit code 2
  [end of output]

  note: This error originates from a subprocess, and is likely not a problem with pip.
  ERROR: Failed building wheel for pyzmq
Failed to build pyzmq
ERROR: Could not build wheels for pyzmq, which is required to install pyproject.toml-based projects

Hmm I’ve not come across this before but it’s not an uncommon issue (i.e. google “ERROR: Failed building wheel for pyzmq”) related here to installing the jupyter package (nothing to do with chipwhisperer itself).

In Linux these types of issues are usually avoided by using pyenv; I’m not sure for Windows, @Alex_Dewar may know better.

My best guess is that Python changed something internally with the 3.12 release that broke pyzmq for a bit, so installing 3.11 or earlier should fix things. There’s a few dependency issues with Jupyter that I’ll need to fix to get ChipWhisperer working with newer versions on Python

1 Like

Thanks guys.

Turns out I’ve switched to Linux in the last week anyway, so trying a fresh install on here.

It’s all gone well until the last nbstripout stuff. running nbstripout --install (last instruction on the Linux install instructions) doesn’t work, looks like it’s a PATH issue, the nbstripout binary just installed via the line above (python -m pip install nbstripout) seems to have installed to ~/.pyenv/versions/cw/bin, so my guess is that needs to be added to my PATH as well? Might want to add that to the instructions if so.

Thanks!

Nope, still no luck.

Added the above to my PATH and ran the nbstripout --install command with no issues after that, rebooted as per the Linux install instructions, cd into chipwhisperer directory and run jupyter notebook and I get the following errors:

Traceback (most recent call last):
  File "/home/user/.pyenv/versions/cw/lib/python3.9/site-packages/notebook/traittypes.py", line 235, in _resolve_classes
    klass = self._resolve_string(klass)
  File "/home/user/.pyenv/versions/cw/lib/python3.9/site-packages/traitlets/traitlets.py", line 2015, in _resolve_string
    return import_item(string)
  File "/home/user/.pyenv/versions/cw/lib/python3.9/site-packages/traitlets/utils/importstring.py", line 33, in import_item
    module = __import__(package, fromlist=[obj])
ModuleNotFoundError: No module named 'jupyter_server.contents'

During handling of the above exception, another exception occurred:

Traceback (most recent call last):
  File "/home/user/.pyenv/versions/cw/bin/jupyter-notebook", line 8, in <module>
    sys.exit(main())
  File "/home/user/.pyenv/versions/cw/lib/python3.9/site-packages/jupyter_core/application.py", line 283, in launch_instance
    super().launch_instance(argv=argv, **kwargs)
  File "/home/user/.pyenv/versions/cw/lib/python3.9/site-packages/traitlets/config/application.py", line 1073, in launch_instance
    app = cls.instance(**kwargs)
  File "/home/user/.pyenv/versions/cw/lib/python3.9/site-packages/traitlets/config/configurable.py", line 583, in instance
    inst = cls(*args, **kwargs)
  File "/home/user/.pyenv/versions/cw/lib/python3.9/site-packages/traitlets/traitlets.py", line 1292, in __new__
    inst.setup_instance(*args, **kwargs)
  File "/home/user/.pyenv/versions/cw/lib/python3.9/site-packages/traitlets/traitlets.py", line 1335, in setup_instance
    super(HasTraits, self).setup_instance(*args, **kwargs)
  File "/home/user/.pyenv/versions/cw/lib/python3.9/site-packages/traitlets/traitlets.py", line 1311, in setup_instance
    init(self)
  File "/home/user/.pyenv/versions/cw/lib/python3.9/site-packages/notebook/traittypes.py", line 226, in instance_init
    self._resolve_classes()
  File "/home/user/.pyenv/versions/cw/lib/python3.9/site-packages/notebook/traittypes.py", line 238, in _resolve_classes
    warn(f"{klass} is not importable. Is it installed?", ImportWarning)
TypeError: warn() missing 1 required keyword-only argument: 'stacklevel'

Another update:

Looks like the issue is with the traitlets python module. The version that seems to install following the official Linux install instructions is 5.14.3 if I remember correctly. So I tried each progressively older version and found that 5.9.0 works. Well…running jupyter notebook actually works now, haven’t tried anything else yet :crazy_face:

So for anyone else facing the traitlets errors above after following the install instructions, go into your cw pyenv virtual environment if you’re not already:

pyenv activate cw

Then run the following:

pip uninstall traitlets
pip install traitlets==5.9.0

Then running jupyter notebook should work fine.

Not sure why ChipWhisperer needs such an old version.

The following versions did not work for me:

traitlets==5.14.0
traitlets==5.13.0
traitlets==5.12.0
traitlets==5.11.0
traitlets==5.10.0

Not sure about minor versions (e.g. 5.9.5)

Update 4:

I noticed there was still an error in the jupyter server output about the panel module after running jupyter notebook, so had to go back to an older version for that too. The version that was installed for me was 0.14.4, going back to version 0.13.0 seems to do the trick:

pip uninstall panel
pip install panel==0.13.0

Now there doesn’t seem to be any errors…for now!

Ok, new error time :expressionless:

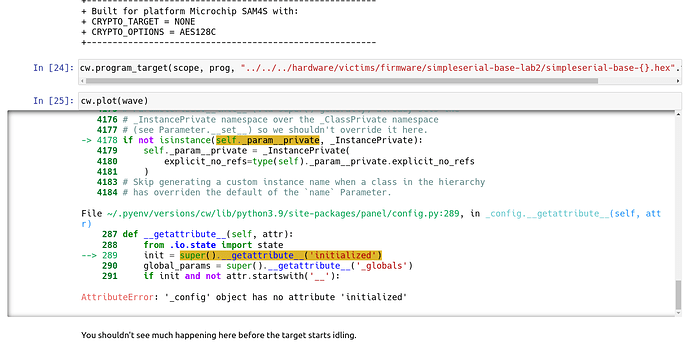
Trying to do Lab 2_1A - Introduction to Power Differences (MAIN), the “Empty” Trace section. Getting the following error when trying to run the cw.plot(wave) line, I’ve rebuilt the firmware and uploaded it to the target (Husky & CW308_SAM4S), all the previous blocks have worked from what I can tell.

The error itself:

---------------------------------------------------------------------------
AttributeError                            Traceback (most recent call last)
Cell In[25], line 1
----> 1 cw.plot(wave)

File ~/Repos/chipwhisperer/software/chipwhisperer/__init__.py:547, in plot(*args, **kwargs)
    545 if (len(args) == 0) and (len(kwargs) == 0):
    546     args = [[]]
--> 547 import holoviews as hv # type: ignore
    548 _default_opts = {'height': 600, 'width': 800, 'framewise': True, 'tools': ['hover'], 'active_tools': ['box_zoom']}
    549 hv.extension('bokeh', logo=False) #don't display logo, otherwise it pops up everytime this func is called.

File ~/.pyenv/versions/cw/lib/python3.9/site-packages/holoviews/__init__.py:115
    111 warnings.filterwarnings("ignore",
    112                         message="elementwise comparison failed; returning scalar instead")
    114 if "IPython" in sys.modules:
--> 115     from .ipython import notebook_extension
    116     extension = notebook_extension # noqa (name remapping)
    117 else:

File ~/.pyenv/versions/cw/lib/python3.9/site-packages/holoviews/ipython/__init__.py:16
     14 from ..element.comparison import ComparisonTestCase
     15 from ..util import extension
---> 16 from ..plotting.renderer import Renderer
     17 from .magics import load_magics
     18 from .display_hooks import display

File ~/.pyenv/versions/cw/lib/python3.9/site-packages/holoviews/plotting/__init__.py:11
      9 from ..element import Area, Image, QuadMesh, Polygons, Raster
     10 from ..element.sankey import _layout_sankey, Sankey
---> 11 from .plot import Plot
     12 from .renderer import Renderer, HTML_TAGS # noqa (API import)
     13 from .util import apply_nodata, list_cmaps # noqa (API import)

File ~/.pyenv/versions/cw/lib/python3.9/site-packages/holoviews/plotting/plot.py:17
     14 import numpy as np
     15 import param
---> 17 from panel.config import config
     18 from panel.io.document import unlocked
     19 from panel.io.notebook import push

File ~/.pyenv/versions/cw/lib/python3.9/site-packages/panel/__init__.py:47
      1 """Panel is a high level app and dashboarding framework
      2 =======================================================
      3 
   (...)
     45 https://panel.holoviz.org/getting_started/index.html
     46 """
---> 47 from . import layout # noqa
     48 from . import links # noqa
     49 from . import pane # noqa

File ~/.pyenv/versions/cw/lib/python3.9/site-packages/panel/layout/__init__.py:1
----> 1 from .accordion import Accordion # noqa
      2 from .base import Column, ListLike, ListPanel, Panel, Row, WidgetBox # noqa
      3 from .card import Card # noqa

File ~/.pyenv/versions/cw/lib/python3.9/site-packages/panel/layout/accordion.py:5
      1 import param
      3 from bokeh.models import Column as BkColumn, CustomJS
----> 5 from .base import NamedListPanel
      6 from .card import Card
      9 class Accordion(NamedListPanel):

File ~/.pyenv/versions/cw/lib/python3.9/site-packages/panel/layout/base.py:13
     11 from ..io.model import hold
     12 from ..io.state import state
---> 13 from ..reactive import Reactive
     14 from ..util import param_name, param_reprs
     16 _row = namedtuple("row", ["children"])

File ~/.pyenv/versions/cw/lib/python3.9/site-packages/panel/reactive.py:33
     29 from .models.reactive_html import (
     30     ReactiveHTML as _BkReactiveHTML, ReactiveHTMLParser
     31 )
     32 from .util import edit_readonly, escape, updating
---> 33 from .viewable import Layoutable, Renderable, Viewable
     35 log = logging.getLogger('panel.reactive')
     37 LinkWatcher = namedtuple("Watcher", Watcher._fields+('target', 'links', 'transformed', 'bidirectional_watcher'))

File ~/.pyenv/versions/cw/lib/python3.9/site-packages/panel/viewable.py:25
     22 from bokeh.io import curdoc as _curdoc
     23 from pyviz_comms import JupyterCommManager
---> 25 from .config import config, panel_extension
     26 from .io import serve
     27 from .io.document import init_doc

File ~/.pyenv/versions/cw/lib/python3.9/site-packages/panel/config.py:417
    414 else:
    415     _params = _config.param.params()
--> 417 config = _config(**{k: None if p.allow_None else getattr(_config, k)
    418                     for k, p in _params.items() if k != 'name'})
    421 class panel_extension(_pyviz_extension):
    422     """
    423     Initializes the pyviz notebook extension to allow plotting with
    424     bokeh and enable comms.
    425     """

File ~/.pyenv/versions/cw/lib/python3.9/site-packages/panel/config.py:216, in _config.__init__(self, **params)
    215 def __init__(self, **params):
--> 216     super().__init__(**params)
    217     self._validating = False
    218     for p in self.param:

File ~/.pyenv/versions/cw/lib/python3.9/site-packages/param/parameterized.py:4178, in Parameterized.__init__(self, **params)
   4172 global object_count
   4174 # Setting a Parameter value in an __init__ block before calling
   4175 # Parameterized.__init__ (via super() generally) already sets the
   4176 # _InstancePrivate namespace over the _ClassPrivate namespace
   4177 # (see Parameter.__set__) so we shouldn't override it here.
-> 4178 if not isinstance(self._param__private, _InstancePrivate):
   4179     self._param__private = _InstancePrivate(
   4180         explicit_no_refs=type(self)._param__private.explicit_no_refs
   4181     )
   4183 # Skip generating a custom instance name when a class in the hierarchy
   4184 # has overriden the default of the `name` Parameter.

File ~/.pyenv/versions/cw/lib/python3.9/site-packages/panel/config.py:289, in _config.__getattribute__(self, attr)
    287 def __getattribute__(self, attr):
    288     from .io.state import state
--> 289     init = super().__getattribute__('initialized')
    290     global_params = super().__getattribute__('_globals')
    291     if init and not attr.startswith('__'):

AttributeError: '_config' object has no attribute 'initialized'

Any help would be brilliant.

UPDATE: Nevermind, this post had the solution, yet another python module that needs to be downgraded.

In another unrelated question, how do you set the colours of the lines in a cw.plot(waveX)? I assumed it was the same as the usual plt.plot(x,y, color='yellow') but that doesn’t seem to work. Neither does the plt.plot(data, 'g') way as shown in the Introduction to Jupyter Notebooks notebook.

Thanks!

Hi , I am facing the same issue in same hardware. How did you resolve it? I am using python3.9.5 in linux.

Hello everyone, I am a novice user of CW1173 ChipWhisperer Lite. I hope that experienced friends can provide solutions to the following questions
Question 1: How to set up a compilation environment for CW1173 ChipWhisperer Lite source code in Windows 10 environment
Question 2: How to recompile the program that controls the Atmel chip, specific operation path and method
Question 3: How to recompile the program of the main control FPGA chip, specific operation path and method
Thank you!

Are you asking how to rebuild the target firmware or the capture firmware?

Building the target firmware is well covered in our online resources. Installation notes are here, and our jupyter tutorials will show you how to build target firmware.

If you’re asking how to build the capture firmware, that’s a different story. It is possible but we strongly recommend that you use our pre-compiled binaries, especially as a novice user, unless you have a need to customize something. This is not well documented process because so few of our users find the need to do this.

The Atmel SAM3U’s firmware is here. Add the naeusb submodule and run “make”. It uses the arm-none-eabi-gcc compiler that the installation instructions above directed you to install.

The FPGA build process is much trickier, and not recommended at all if you have no FPGA experience. You’ll want to run the makeprojects_win.bat file, then open the resulting .xise file with Xilinx ISE. If you want to use glitching you’ll need to generate the partial reconfig files.

If you’ve never done it before, I must warn you that building FPGA bitfiles is not at all like building software. This is especially true in the case of the CW-lite FPGA design because the FPGA is very close to full capacity. In such designs, even trivial changes to the source code can lead to implementation failure (i.e. Xilinx ISE won’t be able to place and route the design, or it won’t work at fast clock frequencies, etc…).