Hello,
We have been experimenting with how voltage fault injection with the Chip Whisperer Husky works. We would like to perform attacks on a cheap microcontroller, but before that we simply wanted to check how the crowbar attack parameters affect the signal.
Our setup is simple, we connect the crowbar output of the CW Husky to its own target power and ground pins, on a breadboard and then we read that power plane with an oscilloscope. So we have this very simple code running on the Husky:
import chipwhisperer as cw

scope = cw.scope()
target = cw.target(scope)

scope.clock.fpga_vco_freq = 800000000
scope.clock.clkgen_freq = 16E6
scope.glitch.enabled = True
scope.glitch.clk_src = 'pll'
scope.glitch.output = 'enable_only' #
scope.glitch.trigger_src = 'manual'
scope.glitch.arm_timing = 'after_scope'
scope.glitch.offset = 0
scope.glitch.width = 2128
scope.glitch.num_glitches = 1
scope.glitch.repeat = [3]
scope.glitch.ext_offset = [1]
scope.io.target_pwr = True
scope.io.glitch_hp = True
scope.io.glitch_lp = False

assert scope.glitch.mmcm_locked

for i in range(10):
    scope.io.vglitch_reset(0.5)
    scope.glitch.repeat=i+1
    scope.glitch.manual_trigger()
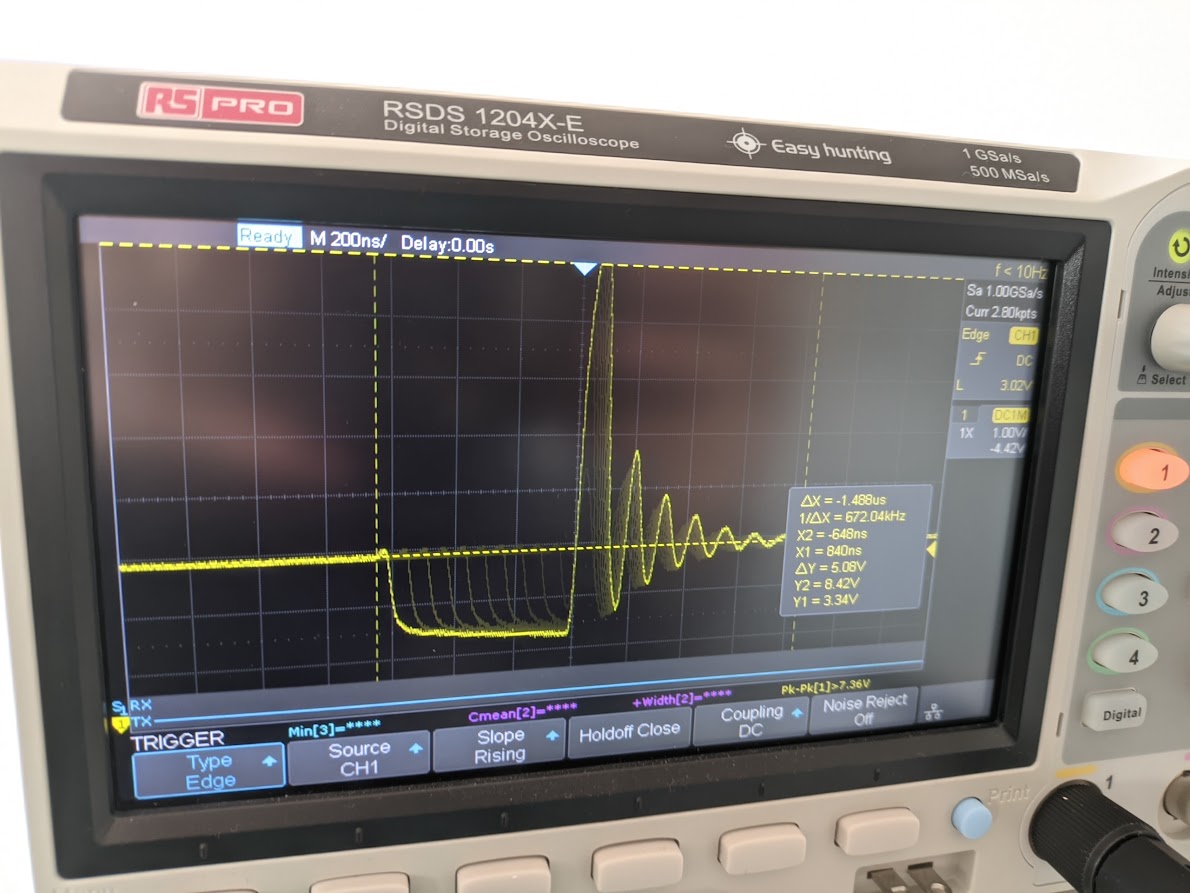
It produces the following oscilloscope picture, which is as expected (with the sweeps showing the smaller repeat value glitches)
Next we only change the line:
scope.glitch.output = 'glitch_only' #enable_only
This was the reason why we set up all other parameters in the first place, since as we understand it, with enable_only most of them do not make a difference. But here we have an offset of 0 and a full width so we essentially expect the glitch_only version of the code to produce the same type of trace on the oscillosope.
Yet there is seemingly no glitch produced and no traces trigger the oscilloscope (having the exact same settings). We have tried to rationalize, but we could not understand why this is the case. We attempted to add a 10k Ohm resistor between the crowbar output and the target power to act as pull-up, but that did not yield any difference in the oscilloscope. We did also try using scope.glitch.width = 1000 which is less than 50% since we read that otherwise it wraps around. This will inevitably not produce the same trace as before, but we were expecting to still see at least something triggering our oscilloscope.
We are pretty certain that we would need to use the glitch_only approach to perform our further attacks so it will be crucial for us to understand why this behaves as it does.