I’m using CW 5.3 on Windows 10, and am going through the different glitching tutorials, but I’m having problems getting results for the “Lab 1_1B - AES Loop Skip Fault Attack in Practice” tutorial on the STM32F3 UFO board. I simply don’t get any key_guess results, its usually just an empty array (sometimes when it’s not empty, it’s less than 16 bytes, sometimes just 1 byte).
All the tutorials leading up to that works fine, and from the “Fault 1_2 - Clock Glitching to Bypass Password” tutorial I have this collection of workable width/offset pairs:
For the AES loop skip attack I therefore use these parameters:
I do get glitches, but the key_guess remains empty. What I do is, given the range of (180,260), if I get a glitch at say, 182, but empty key_guess, I change glitch_loc to (183,260), and so forth. I also change the width and offset slightly, but nothing better comes out of it.
Any ideas of what I could do to get good results in this tutorial?
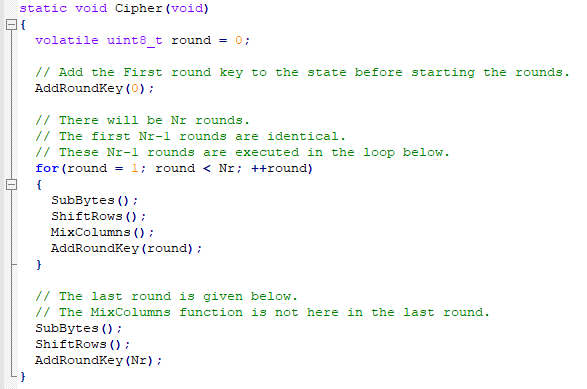
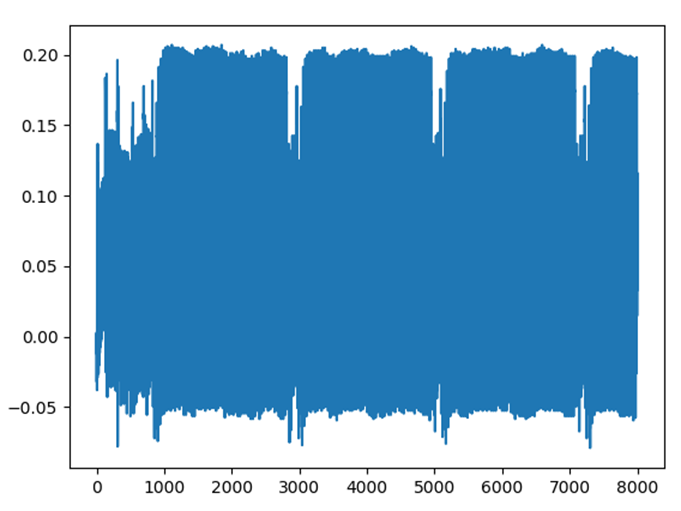
You’re not actually breaking out of the loop there. That repeated pattern in the power trace is the rounds of AES. The correct power trace should basically look like a single one of those rounds (though you’ll be missing the MixColumns operation, so it’ll be a bit shorter). You’ll know it when you see it, as it will look very different to the rest of the power traces.
These earlier sca201 labs are actually quite a bit tougher than the last one I think, so you may want to skip these and come back if you really get stuck
You mean fault201, right? I’m just quite eager to get my hands on, and understanding, the “Lab 1_3B - DFA Attack on AES” tutorial, but I’m taking it in the steps according to the tutorial numbers
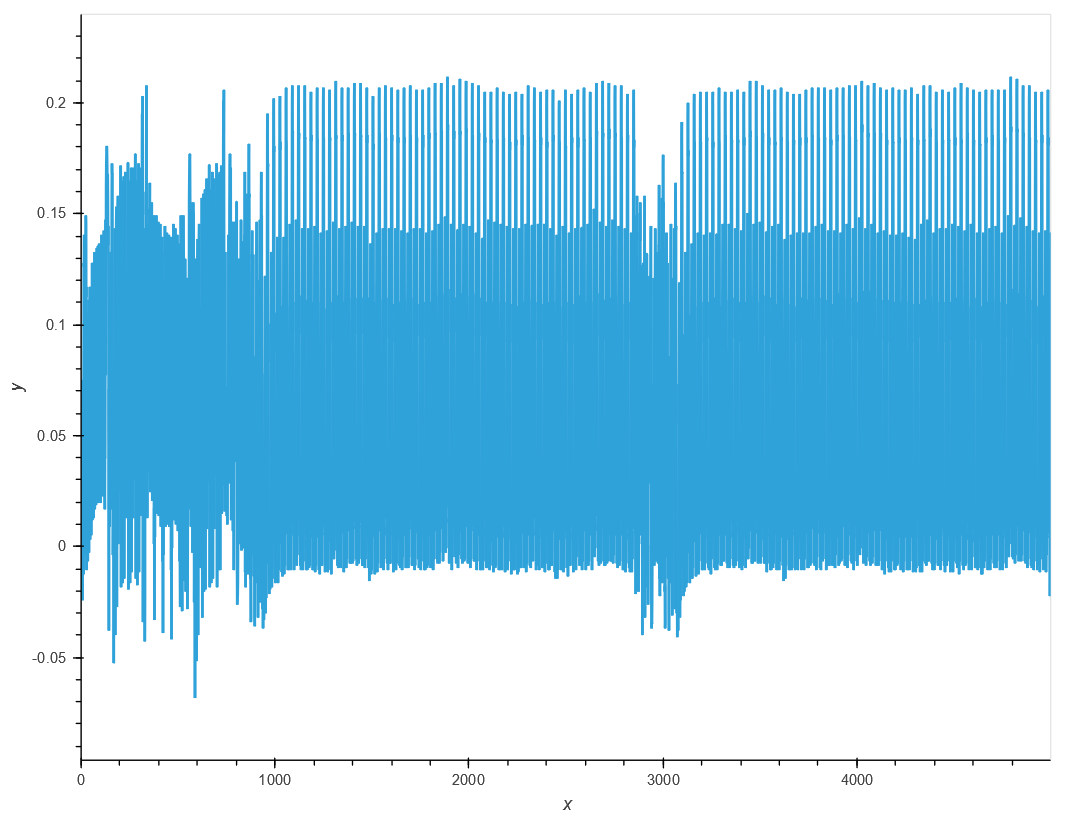
Since I’m new to these glitch attacks, I hope you don’t mind me asking some mundane questions. With some other slightly different parameters (scope.glitch.width = 3.58) and a glitch at 110, I get this plot, I am just curious as to how to interpret it compared to my previous posted plot:
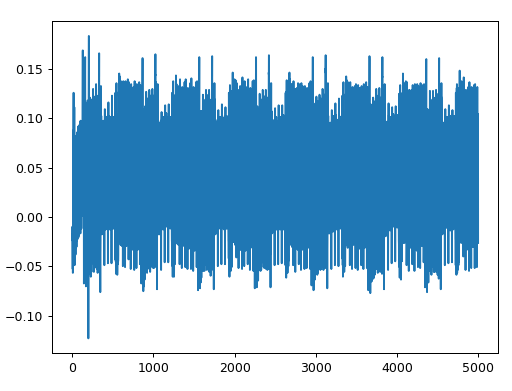
I believe that’s the target crashing. Do you get any output back from the target in that case? If you’ve got it, you should still have this section, without the square-ish section:
Oh, the output is the ciphertext returned from the target. No need to zoom in here, just the part I highlighted should still be in the final trace. For the one where I think the target crashed, you only see the very beginning (which would be the AddRoundKey operation). You should see AddRoundKey, SubBytes, ShiftRows (very short, not really visible) and AddRoundKey again.
Hi,
I left this problem for a while, and picked it up again. I’m still not getting a proper gliltch, although the code stops at some value and says I’ve gotten a glitch, but I’m still getting 10 rounds. Any idea?
Hi again, sorry I’ve been away for a while. As an example, if I get a glitch at 174 (with glitch_loc = range(170, 260)), the returned ciphertext is CWbytearray(b’4e ae ae a7 ae 42 9f 90 8e d2 60 6f 89 b1 8a 50’).
You’re trying to glitch at the end of the AddRoundKey() operation. 174 is a little early I think. For reference, I got the proper glitch at 309. Unfortunately, I think getting the correct glitch it much less consistent than I was seeing when I originally wrote up the lab, but keep at it and you should eventually get it.
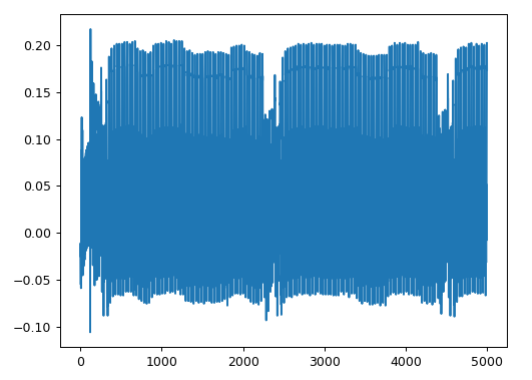
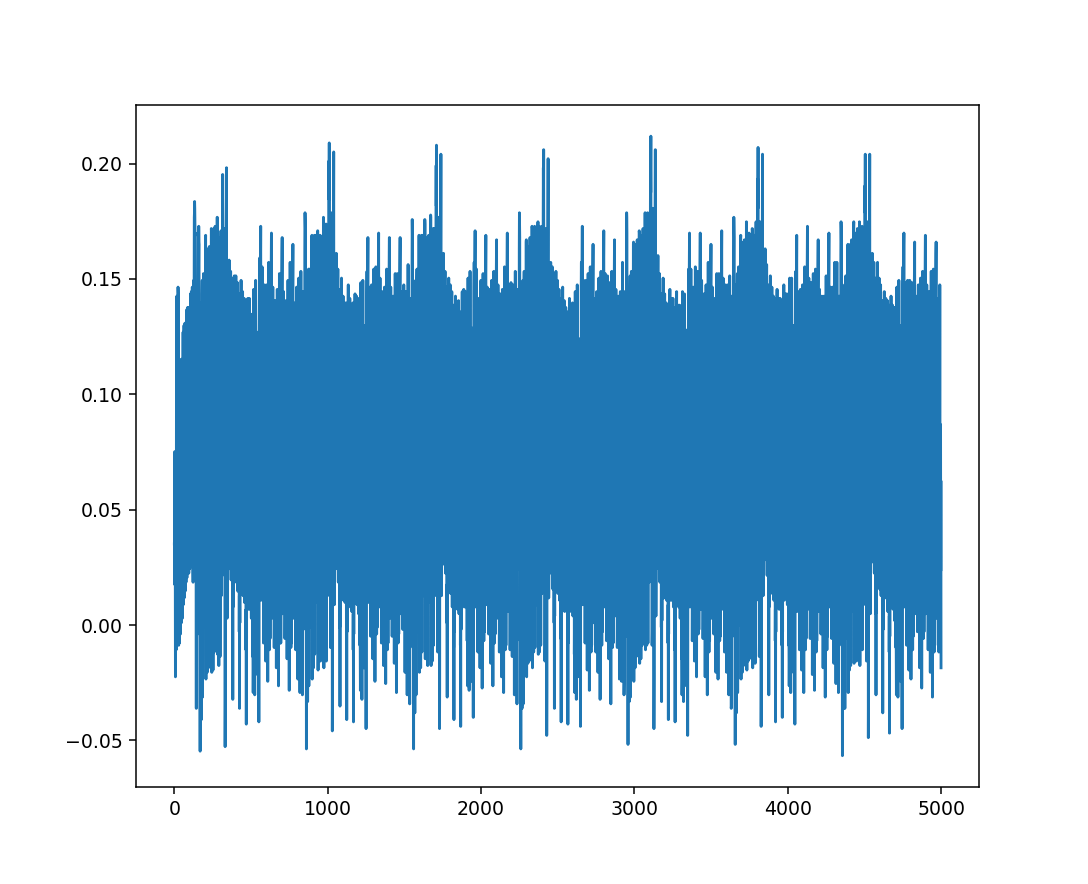
Thanks! I’ll keep at it. To get an idea of what a glitched curve might look like, I commented out the loop for rounds 1-9 in the aes.c file and get similar plot as you have. But for some reason my plots are very “porridgy” for some reason compared to yours. Here’s an example:
I think the difference if plots is just me using bokeh/holoviews (if you’re on the latest CW version you can now do cw.plot(data) to easily plot stuff).
EDIT: I will mention that getting the loop skip here seems to be very dependent on glitch settings. I get it very consistently using width=3 and offset=-12
It finally worked! Had to try glitches up to 308, which did the trick. I’d just never gone over 300 before (think I usually stopped at around 290), cause I thought the 260 that was stated in the tutorial would be about as high as I’d need to go.