Hello i´ve tried to do the same like in this video from Colin O´Flynn: https://www.youtube.com/watch?v=dVkCNiM0PL8
on my own target. I´ve implemented a UART program with the same for loops, variables and outputs. I use simple jumper wires for the VCC glitch pin and GND. My target runs at 48MHz and i´ve tried to use different frequency´s for the Chip Whisperer (48MHz, 96MHz, 100MHz), but i think this has no influence for this simple glitch.
When i use a repeat value of 48 my target reboots and when i use values lower than 48 nothing happens. The output values do not change. I also tried with High, Low and High&Low Power Glitch, only the values for repeat change when the target reboots.
What can i do to get successes? Remove Capacitors near the Core Voltage? Or is this a sign that this target cannot be glitchted?
Yeah, this would probably help. Another thing you can try is to bump up the CW frequency even higher, as this increases the resolution of repeat/ext_offset. This microcontroller glitch attack is probably better to work off of instead of the Raspberry Pi glitch.
I don’t think there really is one for the glitch module. I’ve run it up to 300MHz and it’s been fine, but I’d imagine it’ll stop working at some point.
Hi again i removed the capacitors near the Core Voltage but i´m still unable to successfully glitch the target with the manual trigger. The repeat value is much lower to reboot the target (repeat = 4) without the capacitors.
Now i´m trying to glitch my target with the glitch for loop from the tutorials with various width, offset etc. settings. But it´s still running
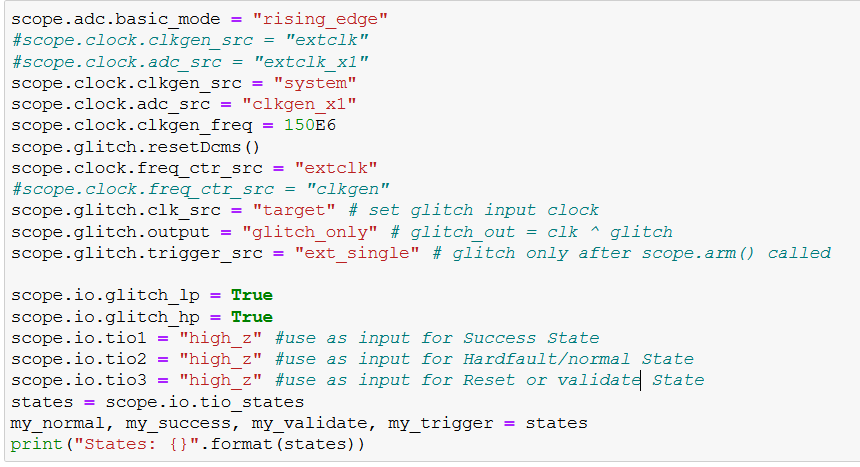
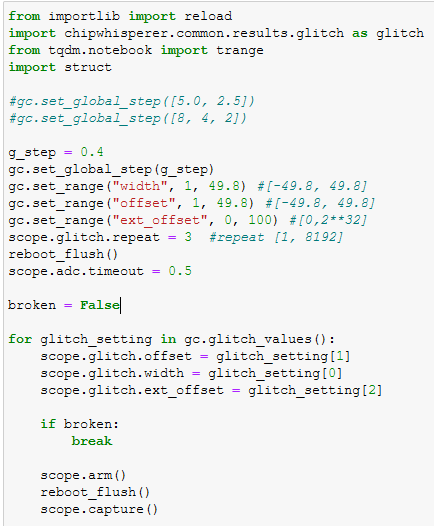
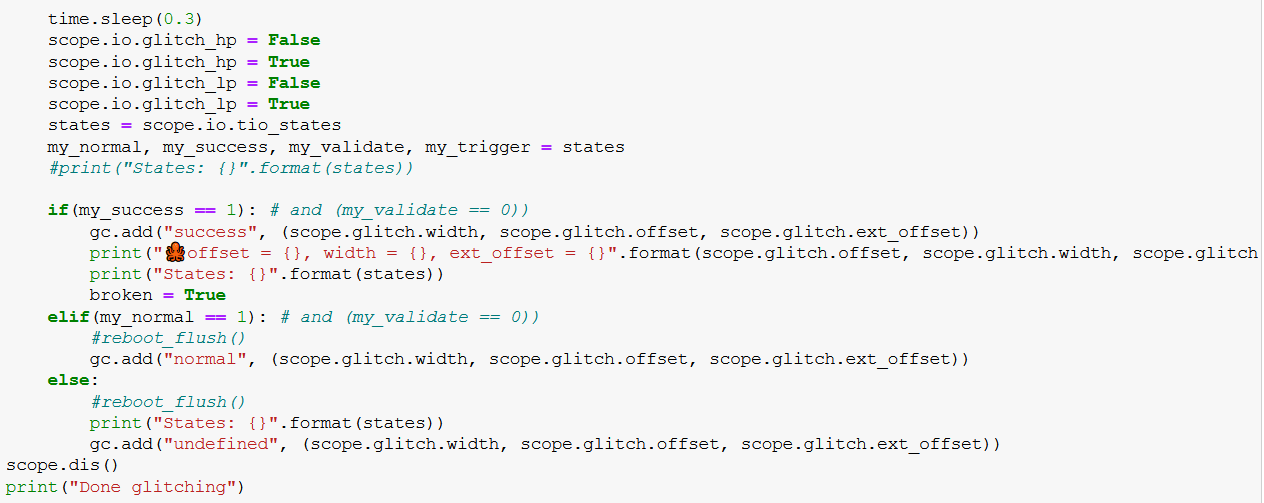
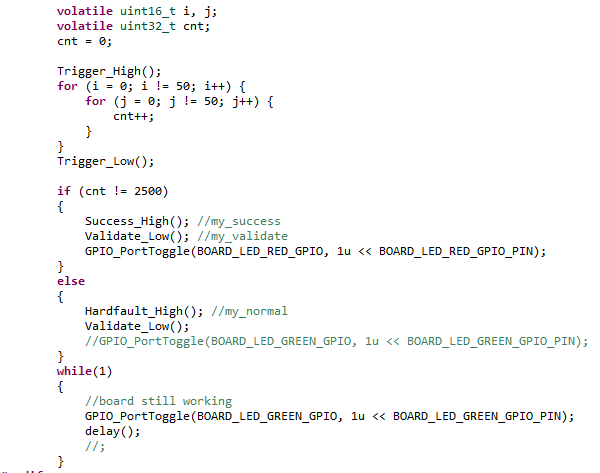
Here´s my code may you find something what i´m doing wrong.
You code looks okay from what I can tell. You may want to bump the frequency up even higher.
The internals of the target, as well as the circuitry around the target are completely different. The LPC glitch is a good indication of the hardware modifications, but unfortunately doesn’t really help much with getting your settings right.
Ok thank you i will let it run with different parameters. I´ve also shorten the for loop and implemented a Cycle Counter on the target → measured some execution times, changed the glitch loop so that it is faster with one entire run.
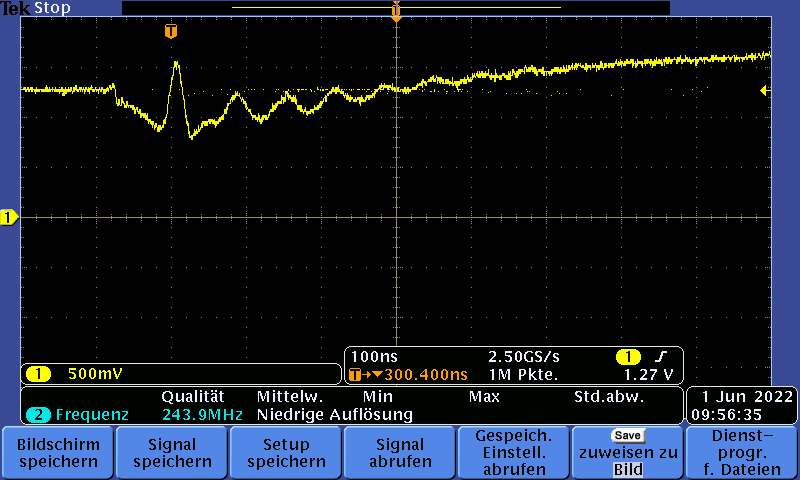
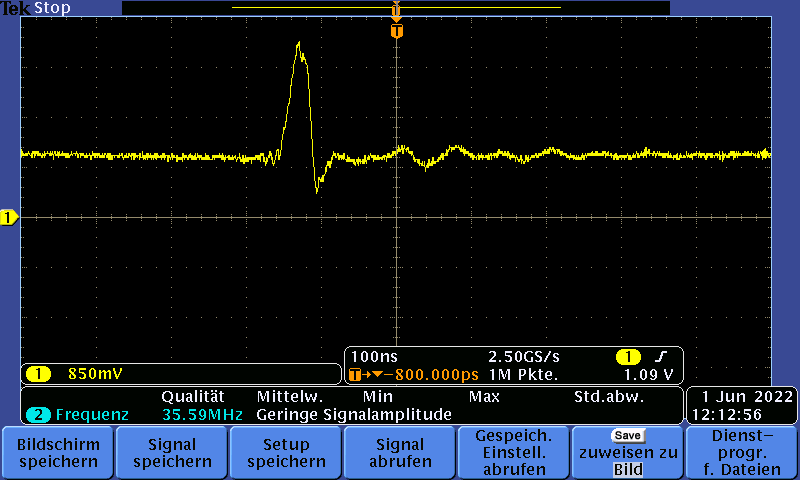
I´ve measured now the Core Voltage with an oscilloscope it looks like this, when i insert glitch pulses.
This is without the Capacitors near the Core Voltage and with LP/HP Glitch active and a repeat value of 7.
That could be fine, but it’s a little hard to tell from the waveform. You can play around with the glitch shape by adding a shunt resistor (or changing its value if you already have one), or by using a different length SMA cable.
Ok thanks again. I try with all these different parameters, resistor values and so on and hope to find some glitch successes.
Is it possible to change the Glitch Voltage from the Chip Whisperers Jupyter Notebooks by Software, my Targets Core VDD is 1.2V, can i only pull it to ground or can i also just pull it to a defined voltage level e.g. 0.6V? Or can i just do this by adding resistors and playing with repeat and width?