Target.write() does not write in lab 1-Connecting to Hardware

Why doesn’t the function target.write() write when I try to run the Function?
Changing the code the following did not help either:

    target.write('p' + '00'*16 + '\n')

When I use target.simpleserial.write(p,msg) it works fine.

    msg = bytearray([0]*16) #simpleserial uses bytearrays
    target.simpleserial_write('p', msg)

target.write() doesn’t return anything; that’s why print(target.write(...)) gives you None.

(aside: in Jupyter, you can get a function’s definition by using “??”: target.write?? will show you the code for the target.write() function)

target.simpleserial_write() is simply a wrapper for target.write().

This:
target.simpleserial_write('p', bytearray[0]*16)

is equivalent to:
target.write('p' + '00'*16 + '\n')

(you should see that both result in the same recv_msg).

Finally, the target will not respond to target.write('p' + '00'*32 + '\n') because the ‘p’ command is expected to have a 16-byte payload; the target firmware is such that it only responds to properly formatted commands. It ignores commands with an incorrect payload size.

2 Likes

What are the instructions just above this block meaning? I understood that it wanted us to send “00” * 32 as well so I was stuck at this part too, wondering why I was getting nothing back in the recv_msg block following this one.

For our first command, command_character='p' and ascii_encoded_bytes="00"*32 (keep in mind this isn’t a binary 0x00 , it’s ASCII "00" , which has a binary value of 0x3030 ). Try resending the 'p' command from earlier using target.write()

Also how are we suppose to use the ?? thing on a function exactly? Executing target.write?? in a block just gives me a syntax error.

Also does this look right? Shouldn’t the output be the same as what is returned in the earlier block (bytearray(b'\x00\x00\x00\x00\x00\x00\x00\x00\x00\x00\x00\x00\x00\x00\x00\x00')), what’s with the z00?

Which instruction are you referring to, exactly?

I’m pretty sure this is a universal Jupyter feature - it’s possible that if you’re on a very old version you don’t have it? What exactly is the error? (in any case this isn’t necessary for completing the notebook; it’s just a shortcut to the source code and its docstrings, which you can also find manually in your CW installation, or on the CW readthedocs scope API page).

That’s the ACK packet of the simpleserial protocol.
(00 is the value returned by get_pt()).

1 Like

Which instruction are you referring to, exactly?

The bit that I quoted, has there about “00” * 32.

Nah just installed the ChipWhisperer for Windows package so nothing should be too old, running Python 3.12.

I just tried the ?? thing again in one of the other notebooks and it ran fine, so maybe it was just an issue with that one particular notebook or something.

That’s the ACK packet of the simpleserial protocol

Ah yep cool thanks!

Finding it a little hard to follow these notebooks, I’m also reading the book but that’s also making my brain hurt.

On the next notebook (Lab 2_1A - Instruction Power Differences (MAIN)) it mentions there before the Simple Instructions section that we shouldn’t see much happening here, but my plot definitely looks like there’s something happening to someone that has never seen this before, or is this plot considered “nothing”? Does this first plot look right?

Also in that next Simple Instructions section below, it mentions to “try inserting the following code”…where exactly? in the simpleserial_base.c in Lab2? In get_pt() where I commented out simpleserial_put? Or somewhere else, like in the main function?
I’m assuming it’s between the User-specified code comments in get_pt()?

Also does this error mean anything? And is this plot looking how it’s supposed to after changing the code to a loop compared to the above? Looks a little different to me, like it’s not doing anything for a little bit longer before the spikey fest begins?

Thanks

“not much happening” is of course relative. The intent of this notebook is for you to teach yourself what this means. In general, the course notebooks don’t give away all the answers; they force you to figure some things out for yourself. Otherwise it’s often too easy to shift-enter your way through a notebook without fully understanding what’s going on.

Yes. One objective of these first couple of notebooks is to learn the general target firmware flow. get_pt() is what ends up getting called when you run capture_trace().

The “unexpected start to command” warning suggests that communication between Python and the target has gotten out of whack.

The intent of this notebook is for you to teach yourself what this means. In general, the course notebooks don’t give away all the answers; they force you to figure some things out for yourself. Otherwise it’s often too easy to shift-enter your way through a notebook without fully understanding what’s going on.

I know, hence why I’m asking here instead of shift+enter’ing my way through it, I want to actually understand what is going on and what I’m looking at. I also don’t want to blindly poke and prod at it and potentially ruin/brick the hardware or something. Like I said earlier, I’m new to all this, baby steps, and I want to make sure I understand what’s going on at each step.

For instance, I understand that I’m looking at a power trace as that’s the entire point of this particular notebook, but what does that mean, a power trace of what, the target running that piece of code from start to finish? (simpleserial_base.c)

Or is it a capture from a certain trigger (trigger_high/trigger_low) so I’m just looking at the user-specified code that’s running between those two flags in the code?

Yes. One objective of these first couple of notebooks is to learn the general target firmware flow. get_pt() is what ends up getting called when you run capture_trace()

Great thanks!

The “unexpected start to command” warning suggests that communication between Python and the target has gotten out of whack.

Ok, any ideas on how to fix it? Restart the kernel in the notebook or something? Pretty sure I’ve just done what the notebook says (and confirmed it here) so not sure why anything would be out of whack. :thinking:

1 Like

Don’t worry, outside of being really careless, like shorting the power rails, there is very little risk of that. Even if you manage to brick your CW capture device, you can simply re-flash it (instructions here). CW is meant to be poked and proded!

When a target running any of our simpleserial-X firmware powers up (which is the case for most, if not all of our non-FPGA targets), it runs main()and then sits in a loop waiting for a valid simpleserial command.

In the case of simpleserial-base.c, you can see that if the 'p' command is received (with the correct argument length), get_pt() is called, and that has calls to trigger_high() and trigger_low(). Those raise and lower the IO4 line (part of the 20-pin connector), which is the default mechanism for triggering a power trace capture on the capture side.

CW has lots of parameters and can be used in lots of diffferent ways - as you make your way through the courses, you’ll learn not only about side-channel attacks, but also what those parameters are.

You’ll also see that for some (but not all) of the courses there is a solution notebook (filename prefixed by SOLN): if you get stuck you can peak at that.

1 Like

Don’t worry, outside of being really careless, like shorting the power rails, there is very little risk of that. Even if you manage to brick your CW capture device, you can simply re-flash it (instructions here). CW is meant to be poked and proded!

Haha thanks, good to know!

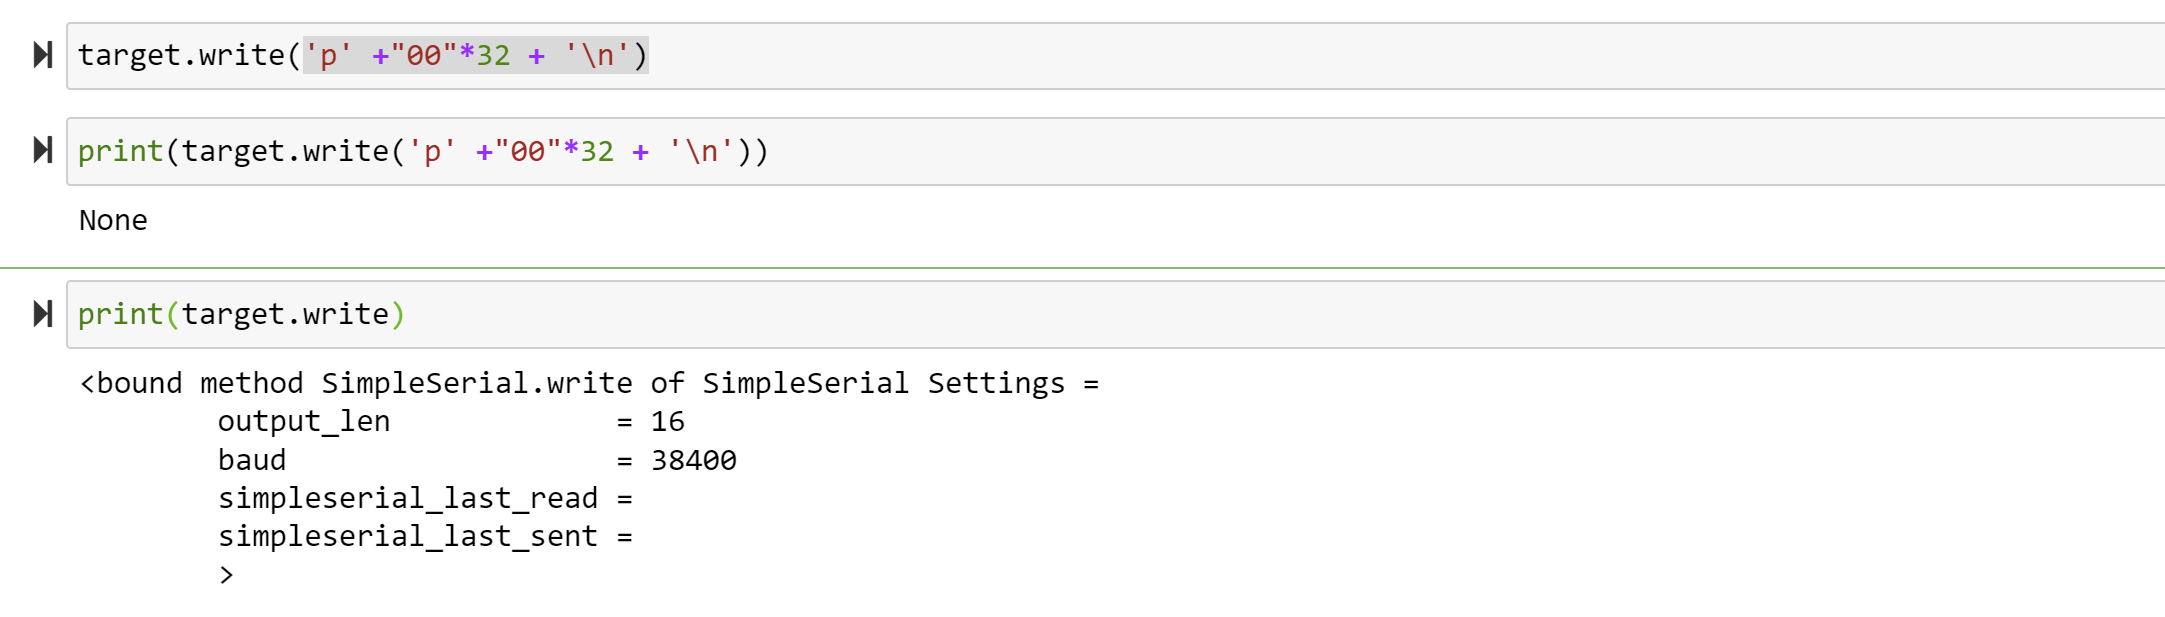
In the case of simpleserial-base.c , you can see that if the 'p' command is received (with the correct argument length), get_pt() is called, and that has calls to trigger_high() and trigger_low() . Those raise and lower the IO4 line (part of the 20-pin connector), which is the default mechanism for triggering a power trace capture on the capture side

Great, thanks for that, I’m using a CWNANO and attached target so I think I can only do some of the courses? It’s still not really super clear to me what raising and lowering the IO4 line means, I see the 20-pin connector, but nothing is connected to it, it’s just 20 holes on the Nano, so not sure if that’s what you’re referring to?

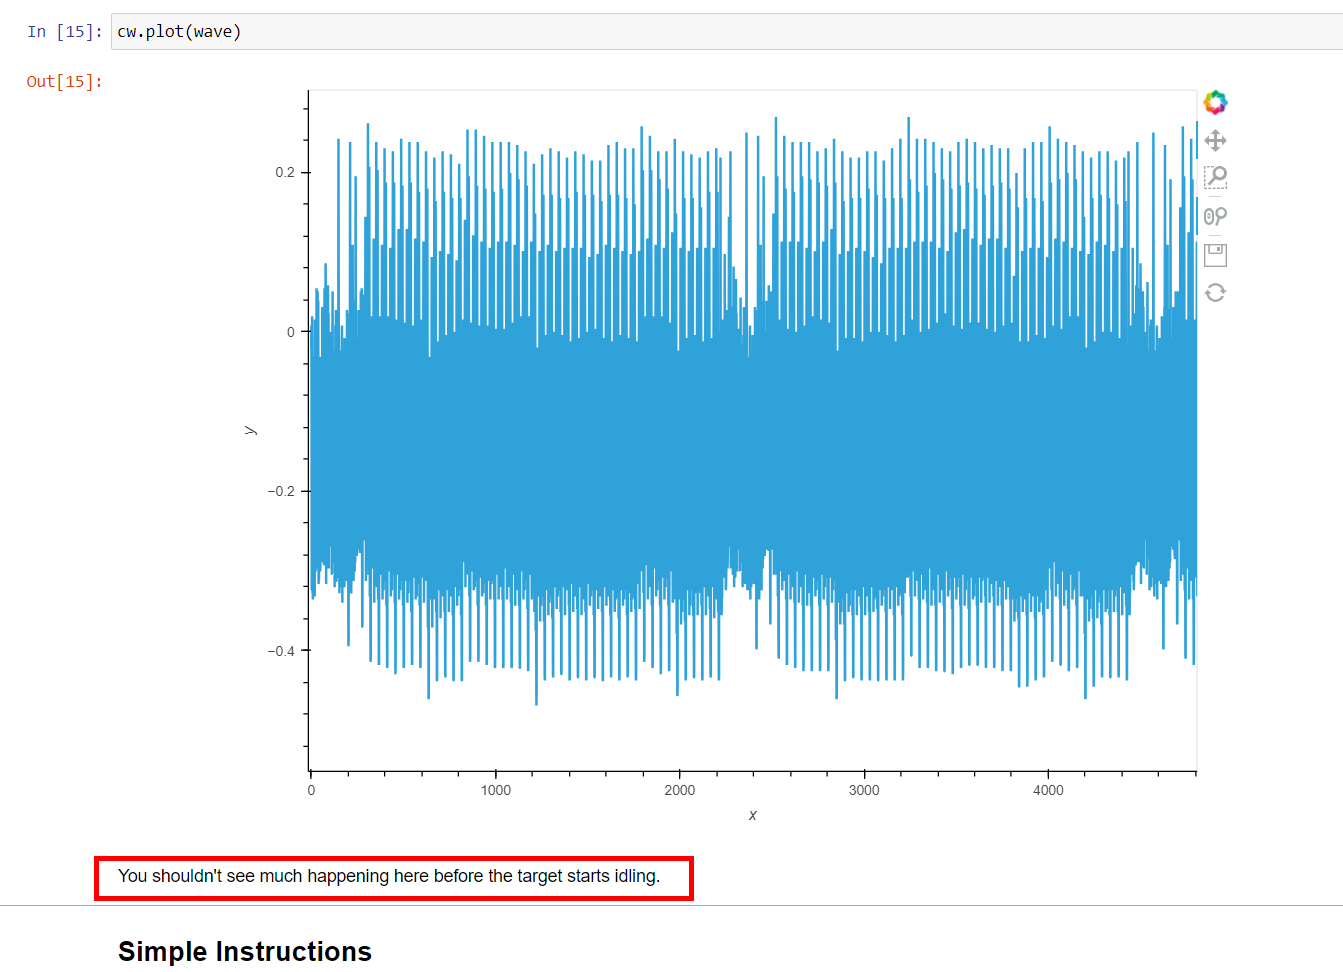
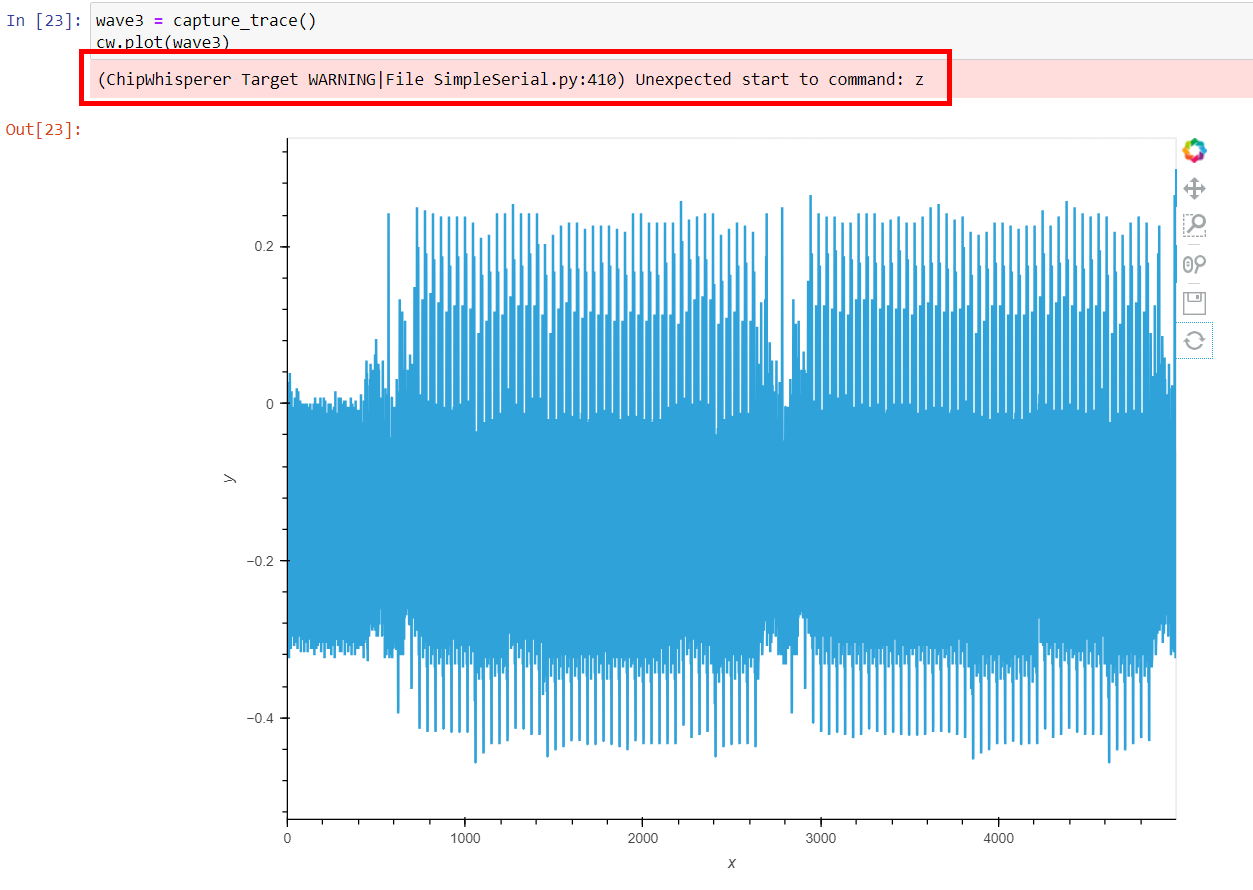
Yeah just saw the solution files too, couldn’t get the password HARDWARE notebook to work but the solution one did I think, although the power traces do look fairly different to the “this is what it should look like” parts in the notebook, but I think it’s still right, the code where it guesses the password based on the differences worked so that was awesome!

I’m about 40% through the Hardware Hacking book too, but what would be required to get this working on an external target, maybe not with the Nano but I’ve pre-ordered a Husky as well, say you have a real IoT device or an old router or something laying around that has a login prompt over UART, could this technique be used on stuff like that? I guess there’s a million variables and the password check code on the device needs to check each character like this course notebook target code does.

As far as I understand, you need to hook into the power lines of whatever device? I guess the hard part is figuring out where all that is on a device you don’t have the schematic/datasheet for.

Thanks for the help by the way, really appreciate it! Sorry to hijack this thread too, really should’ve started my own, but I got excited and started diving in as soon as my Nano arrived the other day haha